If you’re bored with dying eggs, here’s the perfect way to have some crafty fun with the kids this Easter weekend. Make this super-cute felt bird’s nest to give your sweetie a few Easter delights of the chocolate or perhaps Peeps variety, or showcase a special Easter surprise. It’s easy, cheap, and darling to boot. What more could you ask?
What You’ll Need
- 1 round cardboard oatmeal canister, or another round cardboard container of similar size (empty, please!)
- 2 9-inch by 11-inch pieces of white wool felt, or whatever color you want your bird’s nest basket to be
- 1 3-inch wooden embroidery hoop
- White acrylic paint
- A couple of clothespins or binder clips to briefly hold things together in lieu of third hand (if you do in fact have a third hand, please disregard)
- Craft, fabric, or wood glue or hot glue gun
- Sturdy craft scissors
- A handful of polyester or cotton fiberfill or wool roving
- Liquid acrylic ink if you want to dye your fiberfill a nice Easter-ish shade
- Small paintbrush
- Mason jar or other container with a tight-fitting lid good for vigorous shaking
First, Do This
Dye Your Stuffing
Note: If you have access to wool roving, you don’t need to worry about any of this dying stuff here, so just skip to the nest itself. Roving already comes in so many beautiful shades, there’s really no need to dye your own, and also, some neutral-colored roving like this would be perfect, I think, like the color of twigs. But if you don’t have any wool roving at the ready, read on for instructions on dying some ordinary fiberfill for your bird’s nest.
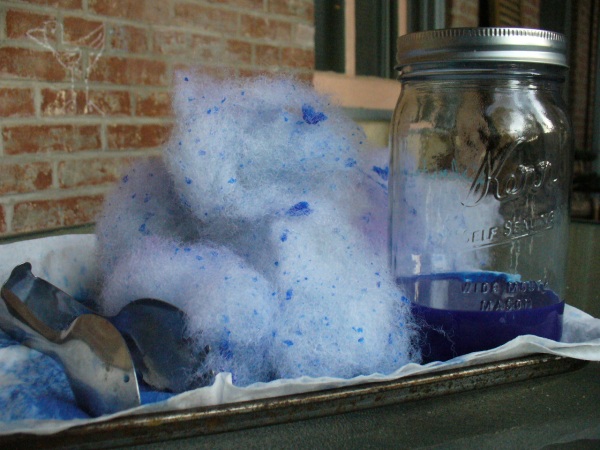
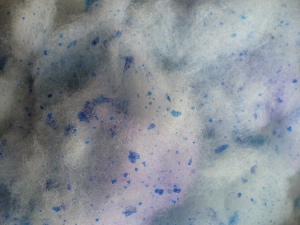 If you want to fill your bird’s nest with candy-hued fluff, place a few drops of liquid acrylic ink (like Liquitex Ink) in a mason jar half-filled with water. Swish it all around for a few seconds till your dye is well mixed and just the shade you want. (Keep in mind that it will dry lighter, so go darker with the dye if you’re not sure.) Now take that handful of fiberfill and stuff it into the jar, smashing as needed so that most of it is submerged in the dye (don’t worry, it doesn’t all have to be covered). Don’t overstuff the jar. It needs room to splash around in there, and anyway, your final Easter basket won’t need all that much.
Now, MAKE SURE THE LID IS TIGHTLY—AND I MEAN IT, REALLY, REALLY TIGHTLY—SCREWED ON THE JAR. Sorry to have to yell like that. But I don’t want you to replicate the Great Easter Egg Dye Disaster of 2006. I went through it so you don’t have to. I’m selfless that way, you know. And seeing as how the giant pot of dye in question was a beautiful dark pink, my kitchen still looks like a Civil War battlefield. So take it from me, screw the lid on tight. Whew. Ok, let’s move on, shall we?
Shake that jar like a maraca, and when you think the fiberfill is nice and wet, carefully open up the jar and poke in there with some tongs, or a fork, or a chopstick. Move the stuffing and separate to make sure the dye’s getting in the nooks and crannies. Close the lid very tightly again, and shake a little bit more.
Spread out some newspaper or paper towels on an old baking sheet. Pull your stuffing from the jar, slowly so that the extra dye drips back into the jar. Spread out the colored stuffing on the tray to dry. Give it a stir every now and then, and make sure it’s all dry before you use it. This might take a few hours, or overnight, depending on how often you stir it up and how much air circulation is going on.
Paint Your Hoops
Also, if you’re so inclined, you can slap a quick coating of white (or any color you like, really, we’re not judgy) acrylic craft paint on the wooden embroidery hoop, skipping the metal closure. You can choose to paint a color that will blend with your finished nest, or use a contrasting color to add another design element. Set it on a rack to dry before you move on to the nest-building. Make sure it is thoroughly dry, too, or you’ll have a nice sticky mess on your hands later.
Now, the Main Event
 [1] Cut the oatmeal container across the diameter, about 3 inches from the bottom. Hang on to the part with the bottom. You can do what you like with the top part. That’s really between you and your oatmeal.
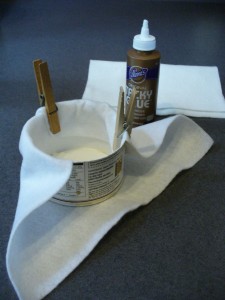
[2] Lay one piece of felt open flat and center the cut oatmeal container on top. Fold the felt around the cardboard container, covering the sides and tucking in the top. Fold the felt and overlap as necessary. Depending on the thickness of your felt, it will either stay folded inside the round container or keep popping back out in a manner clearly designed to drive you to drink—It’s ok, have a quick cocktail, we’ll wait. If it behaves perfectly, staying neatly in its place all on its own, no help required, like that older, smarter sister who always beat you at everything and got into Yale and Stanford and won’t let you forget it and thinks she’s sooo perfect, well then, get on with things. If not, at this point you might want to dot some craft or fabric glue on the underside of the felt and press it to the cardboard if your felt isn’t staying put. Further wrangle it into submission with a couple of judiciously placed clothespins, just for the time being. It’s ok if it doesn’t perfectly cover the whole container. Who wants perfection anyway, right? So boring. And also, we’ve got backup coming.
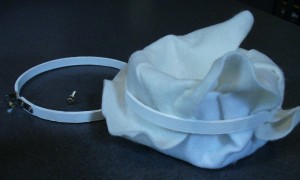 [3] Once your glue is dry (this should only take a minute or two), remove the clothespins. Fold the second piece of felt in a bit of a funnel shape, bringing the edges up together, and push it down into the container. Now, take the inner ring of the embroidery hoop (the one without the metal screw closure) and slide it down the over the container, encasing both pieces of felt. Stop at about the midpoint of your container. It should be snug enough to stay put there. Tuck any stray corners of felt inside to hold everything in place.
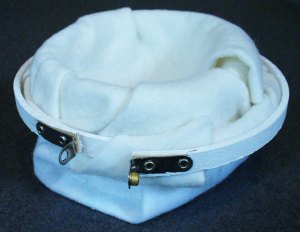 Now, once you’ve got everything reasonably situated where you want it, slide the second, outer ring of the hoop over the first ring, and once again tuck any stray bits, folding, wrapping, and draping artfully so that the rings are mostly covered and it’s not too bunged up in one place or another. Now, grab hold of the two pieces of the ring’s metal closure and pull, pull, pull until they’re close enough to get the screw in. Screw the ring closed as tightly as you can without crushing your nest.
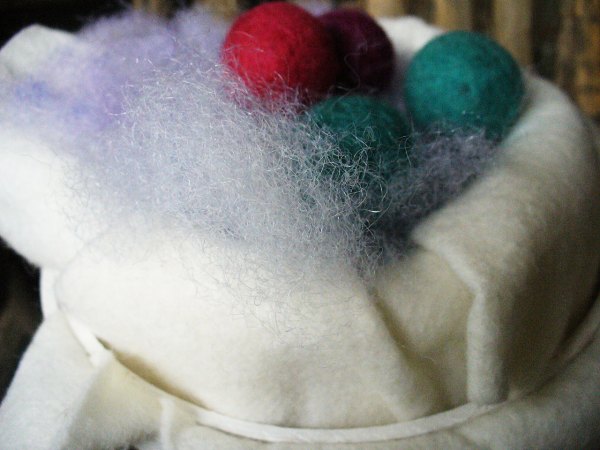
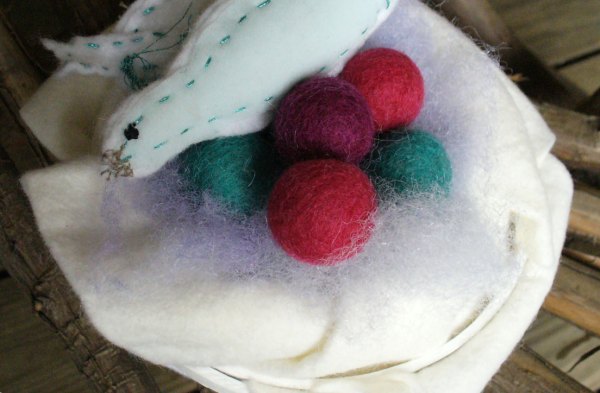
[4] That’s it, you’re done! Only the fun parts remain. Fill to your heart’s content with your stuffing of choice, and top it all with some treats for your sweets. Stand back and admire your creation, preferably with chocolate in hand.

