DIY Felt Bird’s Nest Easter Basket

DIY Felt Bird's Nest Easter Basket

If you’re bored with dying eggs, here’s the perfect way to have some crafty fun with the kids this Easter weekend. Make this super-cute felt bird’s nest to give your sweetie a few Easter delights of the chocolate or perhaps Peeps variety, or showcase a special Easter surprise. It’s easy, cheap, and darling to boot. What more could you ask?

What You’ll Need

  • 1 round cardboard oatmeal canister, or another round cardboard container of similar size (empty, please!)
  • 2 9-inch by 11-inch pieces of white wool felt, or whatever color you want your bird’s nest basket to be
  • 1 3-inch wooden embroidery hoop
  • White acrylic paint
  • A couple of clothespins or binder clips to briefly hold things together in lieu of third hand (if you do in fact have a third hand, please disregard)
  • Craft, fabric, or wood glue or hot glue gun
  • Sturdy craft scissors
  • A handful of polyester or cotton fiberfill or wool roving
  • Liquid acrylic ink if you want to dye your fiberfill a nice Easter-ish shade
  • Small paintbrush
  • Mason jar or other container with a tight-fitting lid good for vigorous shaking

Hand-Dyed Polyfill for DIY Felt Bird's Nest Easter Basket

First, Do This

Dye Your Stuffing

Note: If you have access to wool roving, you don’t need to worry about any of this dying stuff here, so just skip to the nest itself. Roving already comes in so many beautiful shades, there’s really no need to dye your own, and also, some neutral-colored roving like this would be perfect, I think, like the color of twigs. But if you don’t have any wool roving at the ready, read on for instructions on dying some ordinary fiberfill for your bird’s nest.

Hand-Dyed Polyfill for DIY Felt Bird's Nest Easter BasketIf you want to fill your bird’s nest with candy-hued fluff,  place a few drops of liquid acrylic ink (like Liquitex Ink) in a mason jar half-filled with water. Swish it all around for a few seconds till your dye is well mixed and just the shade you want. (Keep in mind that it will dry lighter, so go darker with the dye if you’re not sure.) Now take that handful of fiberfill and stuff it into the jar, smashing as needed so that most of it is submerged in the dye (don’t worry, it doesn’t all have to be covered). Don’t overstuff the jar. It needs room to splash around in there, and anyway, your final Easter basket won’t need all that much.

Now, MAKE SURE THE LID IS TIGHTLY—AND I MEAN IT, REALLY, REALLY TIGHTLY—SCREWED ON THE JAR. Sorry to have to yell like that. But I don’t want you to replicate the Great Easter Egg Dye Disaster of 2006.  I went through it so you don’t have to. I’m selfless that way, you know. And seeing as how the giant pot of dye in question was a beautiful dark pink, my kitchen still looks like a Civil War battlefield. So take it from me, screw the lid on tight. Whew. Ok, let’s move on, shall we?

Shake that jar like a maraca, and when you think the fiberfill is nice and wet, carefully open up the jar and poke in there with some tongs, or a fork, or a chopstick. Move the stuffing and separate to make sure the dye’s getting in the nooks and crannies. Close the lid very tightly again, and shake a little bit more.

Spread out some newspaper or paper towels on an old baking sheet. Pull your stuffing from the jar, slowly so that the extra dye drips back into the jar. Spread out the colored stuffing on the tray to dry. Give it a stir every now and then, and make sure it’s all dry before you use it. This might take a few hours, or overnight, depending on how often you stir it up and how much air circulation is going on.

Paint Your Hoops

Also, if you’re so inclined, you can slap a quick coating of white (or any color you like, really, we’re not judgy) acrylic craft paint on the wooden embroidery hoop, skipping the metal closure. You can choose to paint a color that will blend with your finished nest, or use a contrasting color to add another design element. Set it on a rack to dry before you move on to the nest-building. Make sure it is thoroughly dry, too, or you’ll have a nice sticky mess on your hands later.

Now, the Main Event

Oatmeal Canister[1]  Cut the oatmeal container across the diameter, about 3 inches from the bottom. Hang on to the part with the bottom. You can do what you like with the top part. That’s really between you and your oatmeal.

 DIY Felt Bird's Nest Easter Basket Tutorial

[2] Lay one piece of felt open flat and center the cut oatmeal container on top. Fold the felt around the cardboard container, covering the sides and tucking in the top. Fold the felt and overlap as necessary. Depending on the thickness of your felt, it will either stay folded inside the round container or keep popping back out in a manner clearly designed to drive you to drink—It’s ok, have a quick cocktail, we’ll wait. If it behaves perfectly, staying neatly in its place all on its own, no help required, like that older, smarter sister who always beat you at everything and got into Yale and Stanford and won’t let you forget it and thinks she’s sooo perfect, well then, get on with things. If not, at this point you might want to dot some craft or fabric glue on the underside of the felt and press it to the cardboard if your felt isn’t staying put. Further wrangle it into submission with a couple of judiciously placed clothespins, just for the time being. It’s ok if it doesn’t perfectly cover the whole container. Who wants perfection anyway, right? So boring. And also, we’ve got backup coming.

Slide Inner Hoop Around to Hold Felt[3] Once your glue is dry (this should only take a minute or two), remove the clothespins. Fold the second piece of felt in a bit of a funnel shape, bringing the edges up together, and push it down into the container.  Now, take the inner ring of the embroidery hoop (the one without the metal screw closure) and slide it down the over the container, encasing both pieces of felt. Stop at about the midpoint of your container. It should be snug enough to stay put there. Tuck any stray corners of felt inside to hold everything in place.

Add Outside Hoop to Basket | DIY Felt Bird's Nest Easter Basket TutorialNow, once you’ve got everything reasonably situated where you want it, slide the second, outer ring of the hoop over the first ring, and once again tuck any stray bits, folding, wrapping, and draping artfully so that the rings are mostly covered and it’s not too bunged up in one place or another. Now, grab hold of the two pieces of the ring’s metal closure and pull, pull, pull until they’re close enough to get the screw in. Screw the ring closed as tightly as you can without crushing your nest.

[4] That’s it, you’re done! Only the fun parts remain. Fill to your heart’s content with your stuffing of choice, and top it all with some treats for your sweets. Stand back and admire your creation, preferably with chocolate in hand.

DIY Felt Bird's Nest Easter Basket

Do I Choose the Crazy or Does It Choose Me?

It Does Not Do To Dwell On Dreams Dumbledore Quote Harry Potter

So, life went kerfflewwy there for awhile. A few weeks ago I found myself suddenly buried in work deadlines and hardly had time to come up for air. The little time I had away from work was, of course, consumed with family, and the puny leftovers went to other general unavoidable commitments of daily grownup life.  Oh, and did I mention that we’re moving in just a few short weeks? So, there’s that.

At first, I obsessively worried about this little blog, scheming about how I would squeeze in time to write some posts, sort through photos. I scribbled ideas (I have piles of these awesome blog planners filled with ideas for future post. Did I mention I’m a list-maker?), and filed them away, mentally and physically, where they grew tentacles of anxiety that threatened to bring my productivity to a screeching halt if I didn’t get a handle on it. And then I was struck by how quickly, over just a few short months, the blog had morphed being from a creative outlet and source of pleasure and to a pressing obligation, a source of stress and worry, another item on the endless mental to-do list.

Ugh. How on earth did this happen? To some degree, it grew from love. I dipped my toe in the blogorama and wasn’t sure how it would feel. But it was indeed love at first sight, and the blog became important to me. I was so annoyed with myself for feeling pressure about something that had been voluntary, pleasurable, and satisfying. A choice, in other words: the furthest thing from an obligation.

So I made another choice. I chose to stop worrying. I let it go, let it fly right out of my brain. Out of the tensed muscles in my neck and the spinning wheel of stress in my brain. Out the window, gone, gone, gone.

What a relief! I am frequently amazed by how I can transform choice into a requirement. I can sometimes feel locked into “have to’s” that I have entirely created in my mind. It seems to me that a lot of our modern-day obligations are just self-created illusions, and when we step out of the dance and get clarity, it’s shockingly obvious that we’re feeling bound up by our own perceptions. In reality, we don’t “have to” do so many of the things we think we do. We want to. Or maybe we don’t. Either way, we have a say in the matter. Not always, but way more often than it seems. This is not a new revelation for me, but it’s easy to lose sight of when you’re in the day-to-day of it all. I occasionally need to give myself a reminder slap to the forehead.

So I had to let go of the need to keep all those balls in the air, and I prioritized my focus. I had to remind myself that the blog would be here when I returned, and if I let go of the “have to,” it would still be a source of pleasure, as intended, and not the self-imposed cherry on top of my typical modern stressful life.

That’s just a really long-winded way of saying that I will be back with more posts, when I get around to it. Hopefully that will be soon. But if it’s not, I’m not going to beat myself up about it.

What about you? Do you have any tricks to keep your eyes on the prize? Or do you get weighed down by the “have to’s” also?

A House of Thumbprint Balloons, Plus Cake

DIY-Up-Balloon-House-Thumbprint-Guest-Poster

« The Find: A roundup of tasty delights, brought to you by the wonderous makers and dreamers of the interwebs, who always seem to have much better ideas than you me.  Prepare to be dazzled forthwith. Plus, there’s cake. »

Up there at the tippy-top of this post, the cutest, most delightful party idea ever: a thumbprint guest poster featuring a house that looks just like the house from the movie Up, with thumbprints as the balloons, from Bleu de Toi. Seriously, I am swooning from the cuteness of this. I might need to have a party RIGHT NOW just so I can do this. I think it would be perfect for kids’ parties and also for a casual wedding when the bride and groom have a sense of humor and are not taking the whole thing overly seriously (yes, you know who you are). There aren’t too many ideas you can say that about: Works for a 5 year old’s birthday or a wedding spectacular. Sign of genius, if you ask me.

Keep going, there’s even more deliciousness ahead:

The-Find-041612

1. Design Milk has a gallery of super-stylish creative business cards. There’s some stunning graphic design on display here, and your old business cards will curl with shame.

If that’s not enough, try 20 more creative business card designs at Bored Panda.  I’m telling you, these cards will blow you away. If you’re in need of inspiration for your own logo or business card, this will spark you to think so far outside the box, your box is now a hexagon. (p.s. If you are a lawyer, or an accountant, or in some other slightly more buttoned-up dignified career, just save yourself the despair and don’t even look. No need for a soul-crushing career reassessment. What good would that do? And really, even a business card that doubles as a functional drum isn’t worth it. Is it?

Drum Business Card

Um, did I mention it comes with drumstick pencils? No, probably should have kept that to myself.)


2. Fabric lust! Sew Mama Sew is having a sale on preorders of some gorgeous new fabric coming in soon, including Alegria by Geninne D. Zlatkis, Cocoon by Valori Wells, Gypsy Caravan by Amy Butler, and Flea Market Fancy by Denyse Schmidt. There are some seriously droolworthy designs here. In fact, some designs are already sold out, and they aren’t even in stock yet! I get it, though. I know I’m ready to refresh my stash for spring and summer. But when you click over there to blow your budget, save some fabric for me, ok?

One-Strap-Kids-Backpack-Tutorial | Sew Mama SewOh, and while you’re there at SMS, check out the new tutorials they’ve posted as part of their Fat Quarter Project. Best of all, these are free, because I know you emptied your bank account on the fabric, right…or is that just me? Anyway, first on my list is this one-strap bag. It’s perfect for The Boy, who, as I’ve mentioned, is always begging me to sew him something.


paven-patterngreen-dust-scratch-pattern-download

3. Want to freshen up your blog, or redecorate your computer for spring? These delicate, lovely backgrounds from Subtle Patterns are free to download. Click through the extensive gallery to find just the right fit, or, even better, you can download all the available pattern files with just one click. If you decide to make use of this amazing design resource, though, do consider clicking the donation button to throw a few bucks to the generous designers.

Lemon-Raspberry-Coffeecake-BHG.com4. I did promise there’d be cake, and I’d never lie to you. I need to make this raspberry-lemon coffeecake immediately. It is like a billboard for spring, and it sounds heavenly. Oh! Did I mention it has a CHEESECAKE FILLING? Because, it does. It has a cheesecake filling. (Pardon me for getting excited, but, you know, sometimes it cannot be helped, and clearly, what with the raspberries and lemon and cheesecake filling, this is one of those times.)

I tell you, I’m holding on to spring with both hands. It always goes too fast, and I am NOT ready for summer, not one bit. I am going to stay smack-dab in the middle of spring for as long as I possibly can. I find denial helps a lot, and I have no problem with that at all.*

5. In search of thank you cards for The Boy after his recent birthday, I found these charming Modern Angle birthday and thank you cards, generously offered for free by Love vs. Design. I especially love that they are fairly gender-neutral, and so will work equally well for boys or girls. Get yourself some if you are similarly in need. (They have lots of charming not-so-free designs for invitations and such also, so check those out as well.)

Ok, off to make that coffeecake now. Hopefully it’s not one of these days. Fingers crossed!

*Click here to download the coffeecake recipe.

Arrowheart Love Notes Pillow

Arrowheart Hand-Embroidered Love Notes Pillow | Embroidery Download Free

My son always wants me to sew him something. As anyone who sews for kids knows,  just like trying to buy cool boys’ clothes in a store, it is often an exercise in frustration. The selection in stores is usually downright sad compared with the real estate given over to all the delightful styles for girls. When it comes to sewing patterns, the choice isn’t much better, and to top it off, it’s just plain hard to sew the kinds of clothes they want to wear once they’re past the baby/toddler stage. So it’s often a challenge to find projects to make for The Boy (who is very, very big now, he’d be the first to tell you), because I’m sure not sewing him jeans! That is way out of my comfort zone. I fare much better with non-clothing items. In that spirit, I recently made him this Arrowheart hand-embroidered pillow. It has a wee pocket on the back to tuck in sweet little messages and other goodies:

Pocket detail on Embroidered Arrowheart Love Notes Pillow

Because, fortunately, although he is very, very big, The Boy is not too old to still want love notes from his mommy.

(I don’t know how R2D2 got in there. He’s wily, that one.)

The best part about this pillow is that it started life as a very well made linen shirt, which had become a bit stained and just generally wasn’t my style. It sat in my closet for years, until a recent purge unearthed it. It made its way to my to-be-repurposed sewing basket, and with a little creative cutting, it’s got new life. I think it’s more beautiful than ever. DIY Embroidered Arrowheart Love Notes Pillow | Upcyclyed Deconstructed Linen Shirt

If you feel like doing a little upcycling yourself, or you’ve got some other fabric that’s in dire need of decoration, download my free embroidery template and get to it.

I find that I’m ruthless these days about culling my closet. Anything made of quality fabric is in jeopardy of becoming source material. I’d much rather put that stuff to good use in a sewing project than let it languish in “what if” land in my closet. As in, “What if someday I do want to wear it?” Because more often than not, someday never comes.

How about you? Have to take the scissors to your closet yet? Once you start, it’s hard to stop!

Arrowheart Embroidery Design Download

Dragon Tails and Hot Air Balloons

Hot-air-balloons-ornaments

Check out these charms from around the Web. With a couple of DIY kids’ projects and tutorials, a thoroughly delightful Etsy shop, and even some cupcakes, there are enough distractions here to keep me going till summer. But at least I’ll have dessert!

Home Decor by LittleGrayFox on Etsy. I’m in love with these ornaments, and everything else in this charming store.

These are so darling, they make me wish I had a girl to make them for. Don’t think The Boy would really appreciate them, but I think they are so clever and so cute.

Ah, but these dragon tails are much more up The Boy’s alley! I can’t wait to make a whole slew of these. I anticipate some serious dragon fun this summer.

This is just a ridiculous amount of deliciousness in one little package. I must try them immediately. A reward after tackling all these kids’ projects?

Actually, now that I think about it, maybe I need to start with the cupcakes. You know, just to build up my strength for all that sewing.

I’m off to track down some Oreos…

Get Some Zakka Style | Come On, You Know You Want To

Zakka Patchwork Linen Bag with Strap

Just finished a new bag, and I’m so in love with it. It’s a Zakka-style linen patchwork shoulder bag with hand-embroidered detailing on the flap, inspired by a Zakka-style patchwork makeup pouch by Rashida Coleman-Hale. (My small zippered pouch somehow grew up to be a shoulder bag with rainbow embroidery on the flap, a magnetic snap closure, and a leather strap I’d sewed for another bag. Not sure how that happened.)

Have you visited her blog, I Heart Linen? It’s amazing. If you’ve never seen her work, check it out for some gorgeous, simple projects that usually, as you might have guessed, feature linen. If you’re not familiar with Zakka, it’s a Japanese style focused on beautiful, useful, simple handmade items created with natural materials. It’s thoroughly charming and I’m a bit obsessed. Zakka items somehow manage to be rustic and sophisticated all at the same time. I Heart Linen has some great examples of this style of sewing. Also, I’m completely in love with her new fabric line. It’s high up on my wish list.

Have you sewn with linen? Honestly, once I started, I found it hard to stop. I raided my closet for old linen shirts and dresses that I never wore anymore. Now every time I go into my closet, I’m likely to come out with something to deconstruct for another project. That linen seems wasted on rarely worn shirts, when it could become a bunch of adorable new Zakka coin purses!

So, what do you think of Zakka style?

Tutorial: Hand-Sewn Reverse Applique Needlebook

DIY Reverse Applique Felt Needlebook Tutorial

DIY Reverse Applique Felt Needlebook Tutorial

Needlebook Tutorial Open Pocket View

As I’ve mentioned before, when I first began sewing, I used my friend’s grandmother’s tank of a Singer. I was so clueless then, I didn’t know how great that old workhorse was. I just wanted to learn to sew, and I used the machine I had available. At the same time, I started to dip my needle into hand-sewing and embroidery.  A book on embroidery caught my eye on Amazon, and I was off to the races. The thing is, it’s really, really hard to describe stitches in words. It is, as they say, like dancing about architecture. I was completely befuddled by the drawings and long explanations of what I was assured were simple stitches that any  beginner could easily master. Sigh. Me? Not so much. The only way I figured any of it out was to get myself some fabric and thread and needles and go to it. (It probably doesn’t help that I’m a lefty. But honestly, the few times I’ve come across embroidery instructions for lefties, I was even more confused!)

So, I found myself in need of this “needlebook” I kept hearing about. I didn’t have a clue what a needlebook was supposed to look like. All I knew was that all the sewing books and blogs seemed to think I had one, or should at any rate, and once I began my tentative attempts at embroidery I could see that I really did need a place to stash those needles and pins so that they didn’t end up underfoot or stuck in the couch cushions (yes, that was a painful lesson learned). So, despite my near-total ignorance on the matter, I set about designing one for myself with some scraps of fabric leftover from the first bag I ever made. My sewing has come a long way since then, but that slapdash, very DIY-looking (and not in a good way) needlebook has done its duty and it has a special place in my sewing bag as a symbol of my tendency—sometimes admirable, sometimes foolish—to dive headlong into a challenge, always presuming I can figure it out.

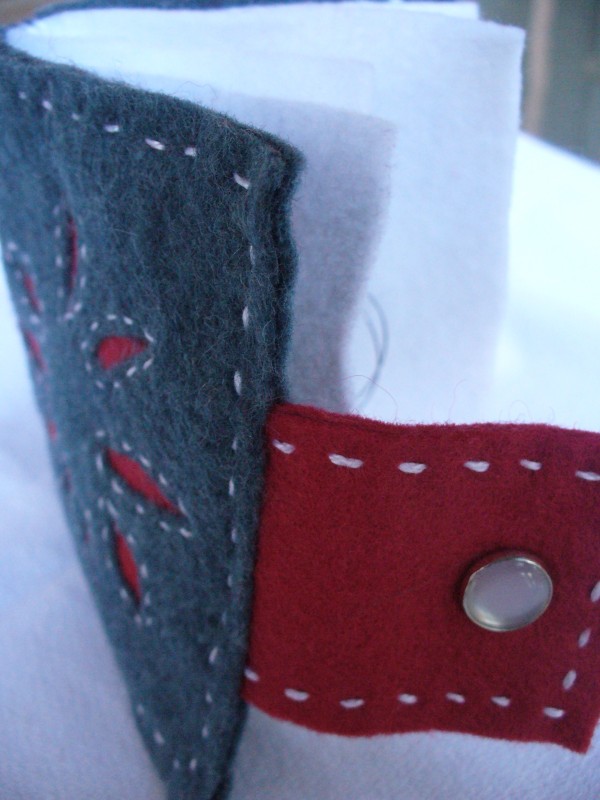
But lately I’ve wanted something a bit more stylish, and more functional as well. Inspired recently by the Alabama Chanin techniques of hand-sewing and reverse applique, I created this felt needlebook with reverse applique. It turned out really well, and so I thought I’d share it. I made two with different appliques for the cover: a wonky cross and a flower petal design. You can download one of my designs or draw your own. I’ve included the design downloads in the tutorial.

I hope you enjoy it! It’s a quick, fun project with a useful result, and a good excuse to try out reverse applique if you’ve never done it.

Get the complete tutorial:
 Reverse Applique Needlebook Tutorial

Afternoon Delights

Embroidered Rainbow Stitches Linen Bag

Hectic days at work and at home meant I didn’t post quite as much as I planned to this week. I’ve got some fun stuff in the works for next week, but in the meantime I thought I’d share a couple of excellent time wasters, in case you’re in need of some wholly unproductive and delightful distractions. And really, who isn’t?

  • Apartment Therapy asks readers: What’s Under Your Bed? Weigh in with your comments and read others’ true confessions. Sure to inspire smug horror and perhaps a touch of Schadenfreude just for good measure. And then the guilt sets in.
  • And if that’s not enough to keep your procrastination in overdrive, head on over to Remodelista to enter their Pin It To Win It contest by creating your own color board on Pinterest. You could win some super-dandy Pantone mugs.  And I won’t be jealous at all. Nope, not even a little bit. At all.

Happy Weekend!


There’s Hope for My Dark, Indolent Soul Yet

Some days look like this:

Burnt Cake

Hopefully, they’re outnumbered by days that look like this:

Cyclamen

So, yesterday? Burnt cake. Metaphorical cake, but still. My printer broke.  Both my computers seemed to be taking a personal day, because they certainly weren’t working. My phone was in a funk, and even my camera had the vapors. I got almost nothing checked off my mental (and actual) to-do lists, and for much of the day I felt like I was spinning my increasingly frustrated wheels. But in the midst of this technological black hole of death, there’s this:

Gandhi's Top 10 Fundamentals for Changing the World

Source: Gandhi typography poster via idea obscura.

I don’t know about you, but sometimes I just need to smack myself upside the head with truth, perspective, and kick-ass typography art. Hit the reset button, I’m ready to go!

[Click here to download a free PDF of this amazingly cool attitude readjuster for your very own self.]

Don’t Fear the Needle

Hand-Sewn Blue Felt Ball

The thought of hand-sewing used to terrify me. When I first started sewing, I borrowed my friend’s grandmother’s ancient Singer. I didn’t know the first thing about machine sewing—or sewing, period. I didn’t even know how to thread it, so I just used the thread that was already in the machine, which fortunately was a nice neutral brown that pretty much worked with everything. Eventually, though, the thread broke, and I was faced with the daunting task of tackling the Singer’s baffling series of tension knobs and hooks and loops. I might as well have been trying to build the space shuttle from scratch for all I knew about the process. Of course, I didn’t have a manual either. So, I turned to the handy-dandy Internet and voila, seconds later I had a PDF of the manual in front of me. I set to work, being in general rather confident in my ability to accomplish pretty much anything as long as I have directions. Sure enough, shortly thereafter I once again had a functional, threaded sewing machine. No sweat. (A few months later, I bought myself a very nice Brother, and I was off to the races. I thread that thing like nobody’s business! Ah, how far I’ve come…)

So why, then, was I so scared to pick up a sharps needle and throw down some stitches with the hands God gave me? Perhaps it was a generational preference for technology, my instinctive presumption that I could never do as good a job as a machine. Also, I did not grow up with a tradition of sewing. I didn’t have a mom who patiently sat with me and passed along all her sewing wisdom, and the wisdom passed down to her from her mother, and so on. I hear these stories so often from sewers and quilters, and I’m always envious. Regardless, I didn’t have that, and I picked up sewing all on my own. (Apparently my paternal grandmother was a master seamstress, though, as was one of her daughters. Unfortunately, my grandmother died before I was old enough to learn to sew, and my aunt was well into a sad case of dementia by the time sewing caught my fancy.)

The first things I sewed were bags, and I dreaded the thought of having to hand-sew the linings closed. I’d read through the directions on a project, and every time I’d come to the point where I was told to turn the bag right side out and blind stitch or slipstitch the opening, I’d think, Well, surely there’s some way to get around this, right? I can’t really have to hand-sew it! Oh, the horror.  I got over it, and actually became a teensy bit proficient at it. I distinctly remember the first time I finished a bag and I truly couldn’t see where I’d stitched it closed. I was so excited I grabbed my clueless husband and shoved the bag at him. “Look!” I squealed. “Can you see where I stitched the opening closed? You can’t, can you?  Yeah me!” He gamely agreed that he couldn’t find the stitches and professed his amazement at my growing skill level. (He’s a sweetie like that. I’m sure he didn’t  have the first clue what he was supposed to be looking for, but after many years of marriage, he is exceedingly well trained in the art of when to blindly and generously praise.)

That was more than a year ago. In recent months, to my surprise and delight, I’ve learned to not just tolerate hand-sewing. I’ve actually grown to love it. It’s a graceful counterpoint, a delicate and subtle contrast to the blunt instrument of machine sewing. It gives me a welcome feeling of control, as opposed to machine sewing, where often I feel that I’m grasping for the reins and my machine is about to bolt for the hills. I’m just holding on for dear life half the time, praying for everything to go as planned.

The rhythms of hand-sewing have become a part of my daily life. And did I mention the convenience? The portability factor is huge! I love being able to sit on the couch with a project in hand, after getting the kiddo to bed, and watch TV with my husband (in the 5 minutes we have alone every day before we pass out from exhaustion). I have taken projects to 3rd grade basketball games, doctors’ waiting rooms, and the school parking lot at pickup time. I’ve even sewed while stuck in a traffic jam!

A year ago I would have been shocked that my current favorite project, the one I’m always itching to pick up when I have a random 30 seconds of downtime, is this:

Continue reading